We have finished the decorating in our house, and I must say it is feeling pretty cozy!
We also got a great deal on a teak coffee table to match our teak hutch in our sitting room. It really makes the room feel a lot more usable. I'm starting to get really excited for the holidays!Thursday, December 20, 2012
Monday, December 17, 2012
Kitchen update!
As usual, Joe and I have been busy around the house!
A couple of weekends ago, we finally got around to painting the kitchen.
I had originally been putting this off, since we weren't sure whether or not we would be renovating the kitchen. I looked into cabinet refacing, and the $9,000+ estimate was a little steep for my liking.
So, since that has been put on the back-burner for now, Joe convinced me to paint the walls and help spruce it up! It was definitely a good idea, since the kitchen looks much warmer and more welcoming now.
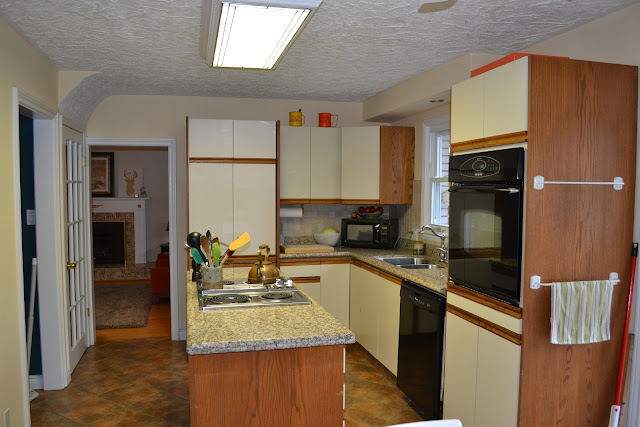
Let me remind you what the kitchen originally looked like: The same, baby yellow that used to fill our house. (Thankfully, painting the kitchen walls means our entire main floor has been repainted! What a relief!)
And here it is now! We chose a warm brown colour. We had a similar colour in our old house, and I never got sick of it. So, here it is again!
I even think it might make the ugly cabinets a little more bearable...
On top of repainting, our cooktop decided to stop working.
I have to admit...I wasn't that upset. The who-knows-how-old, stainless steel cooktop was the only stainless steel appliance in our kitchen. Everything else is black. I saw it as an opportunity to make the kitchen look nicer! The problem was that the old cooktop is a Jenn-Air, down draft. That means that it basically needs to be replaced by a Jenn-Air, down draft, unless we want to add in a hood vent of some kind. So, I went on Kijiji and found a black cook top that was the same dimensions as our current one. Perfect! We picked it up for a mere $150 (compared to about $1000 new) and had it installed the next day (by an electrician that we also found through Kijiji).
 |
| Before |
 |
| After |
See how it matches our kitchen?!
There you have it. I'll leave you with a before and after. It's still not the kitchen of my dreams, but it looks MUCH better!
  |
Sunday, December 2, 2012
Bathroom Makeover!
It is finished at last!
After a lot of elbow grease, our upstairs bathroom is done!
In case you forget what it looked like before, here it was in all of it's glory:
The previous owner of our house was a tiler by trade... yet he still chose this colour combo? I also question the choice of the blue and maroon light fixture? So special. To put it simply, it was a mismatched mess.
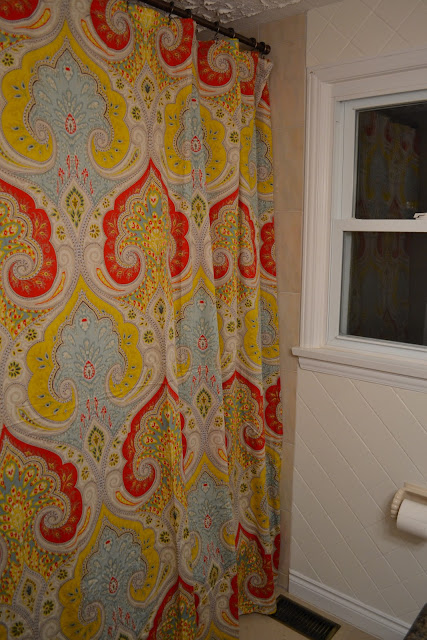
As you can see, there was a very unsightly sliding door over the tub. We chose to remove this and add a fun curtain instead.
We also decided to take down this shallow cupboard, behind which were holes right into the tile. We patched them up with regular drywall mud... so far it seems to have worked ok!
Before we started, I read online that it is important to thoroughly scrub tile using TSP before painting. That way there will be no residue between the tile and the paint, which makes the paint stick much better (and more permanently).
We started by taking down the light fixture, mirror and cabinet. Then, I painted on 2 coats of all-surface primer. It was extremely tedious and took way longer than expected. I thought it would be a one weekend job start to finish, but after one weekend I only had the primer down! It was a little frustrating.
Once the primer had thoroughly dried, it was time to paint! I did 2 coats of bathroom paint in a neutral, warm white. It looks much better!
My original plan was to buy a new light fixture for above the mirror. However, when I went looking there didn't seem to be any that would fit perfectly. So, I decided that instead of replacing the whole light fixture, I would simply change the glass covers. I got these two for about $16 at Lowe's. A much cheaper option and I'm happy with how it turned out! I'm also loving how the bathroom looks without the awkward cupboard. I will need to get some artwork to put up in it's place.
I found this shower curtain at Bed, Bath and Beyond. I really wanted the floor-to-ceiling look, so I found a regular curtain I liked and actually ordered the longer version online. I love the colours and pattern! Such a nice change from the ugly sliding doors. And it will be much easier to bathe a baby in that tub now :)
All in all, I am very happy with how it turned out. I still may one day paint the vanity, but that will have to wait for another day!
And let me show a Before and After, so you get the full effect :)
As for the price break down:
Paint & Primer: About $80
Shower curtain, rod and hooks: About $100
New glass light covers: $16
Total: $196
So, for less than $200, it feels like we have a whole new bathroom! Love it.
Subscribe to:
Posts (Atom)


